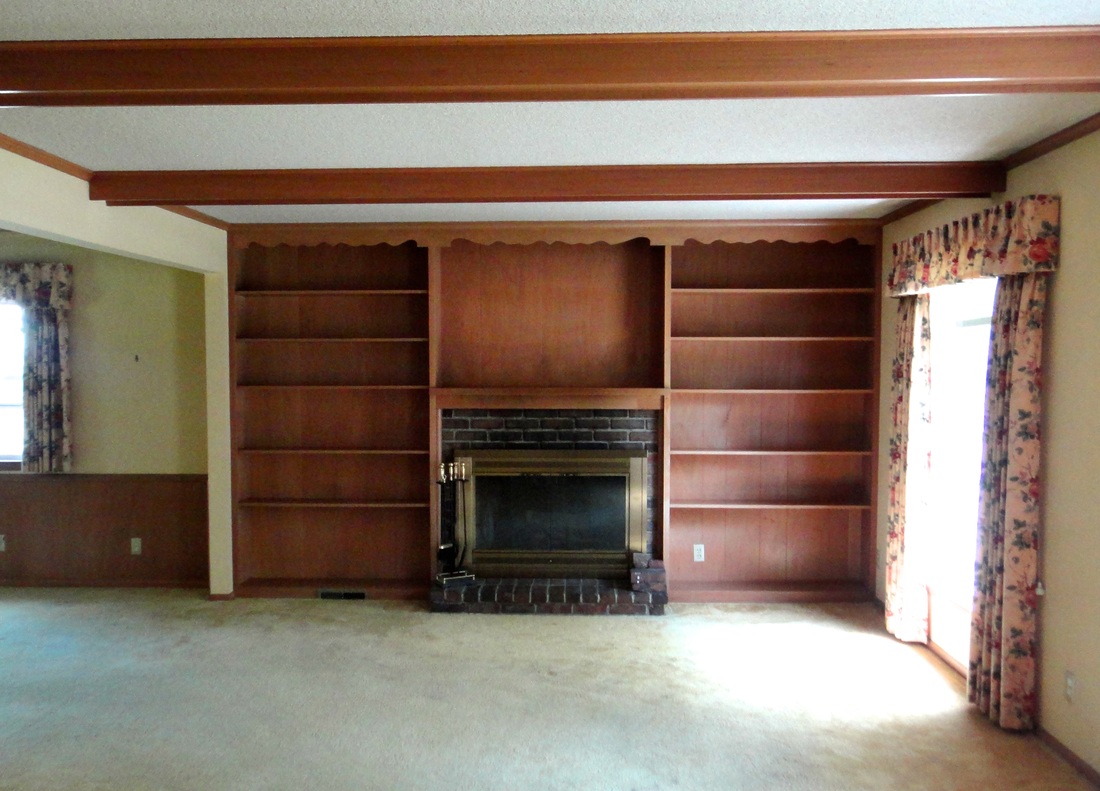
When Lucas and I bought our first home in May, we created a list of projects. Our home was built in 1961, and while in great structural shape, it's cosmetically stuck in the 60's. One of the projects on the to do list was the fireplace. We love having a fireplace and built-in shelves, but the old brick and brass look just didn't ring our bell. I convinced Lucas to let me whitewash it.
The Brick
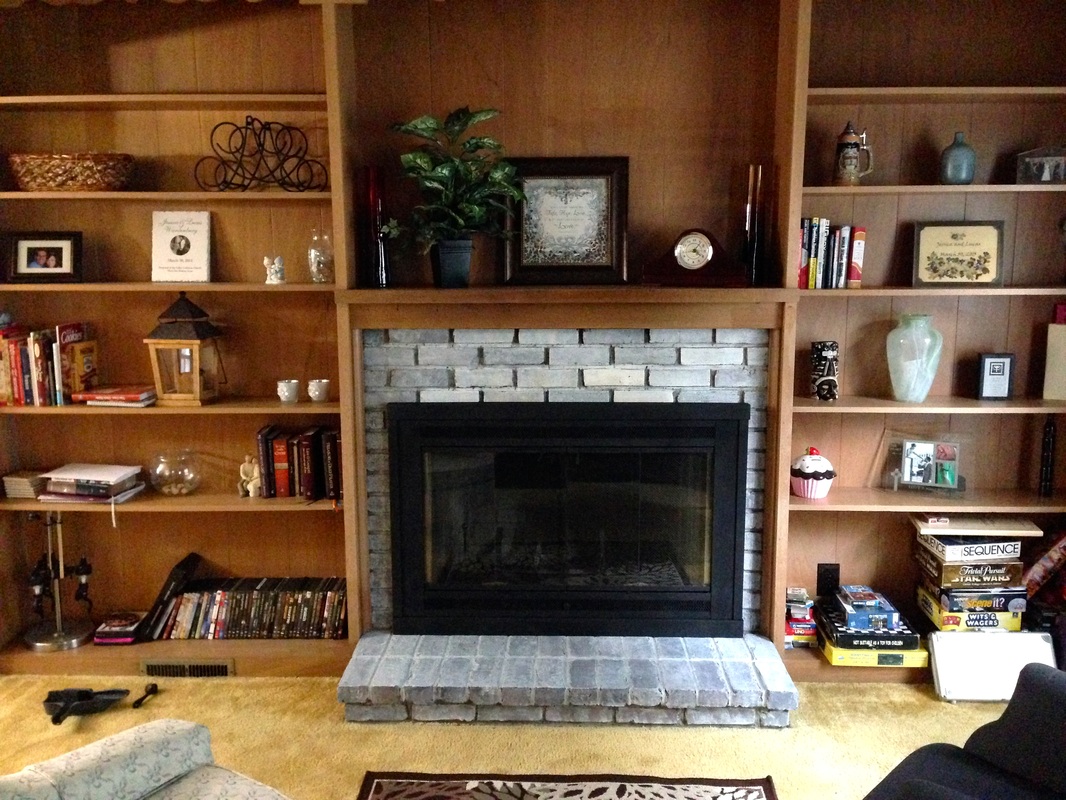
Whitewashing is not the same as painting. When you whitewash, you mix the paint with water to allow some of the brick's natural color to come through. The big decision you have to make is how much color you want to show. Looking around online I found a few different formulas. Some recommended 1 part water to 1 part paint for a more white look. Some recommended 3 parts water to 1 part paint to show more brick color. I decided to go with 3:1 at first. Below is the result. The brick almost just looked dusty. So I went back over with another coat of 2:1.
First, clean off the bricks. Who knows the last time they were cleaned, so getting off any dust, grime and soot is a good idea. Use a paintbrush to apply the paint, and have a rag handy to catch any drips. After the paint sits for a minute or two, feel free to dab the bricks to blend in the paint and remove the brush strokes. If you start to dab right away, you will remove a lot of the paint so make sure to let it set.
The Brick
Whitewashing is not the same as painting. When you whitewash, you mix the paint with water to allow some of the brick's natural color to come through. The big decision you have to make is how much color you want to show. Looking around online I found a few different formulas. Some recommended 1 part water to 1 part paint for a more white look. Some recommended 3 parts water to 1 part paint to show more brick color. I decided to go with 3:1 at first. Below is the result. The brick almost just looked dusty. So I went back over with another coat of 2:1.
First, clean off the bricks. Who knows the last time they were cleaned, so getting off any dust, grime and soot is a good idea. Use a paintbrush to apply the paint, and have a rag handy to catch any drips. After the paint sits for a minute or two, feel free to dab the bricks to blend in the paint and remove the brush strokes. If you start to dab right away, you will remove a lot of the paint so make sure to let it set.
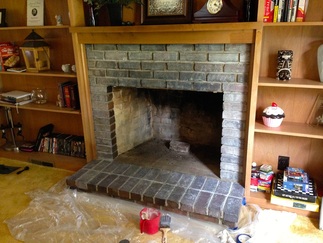
Whitewash with 3 parts water to 1 part paint
The Cover
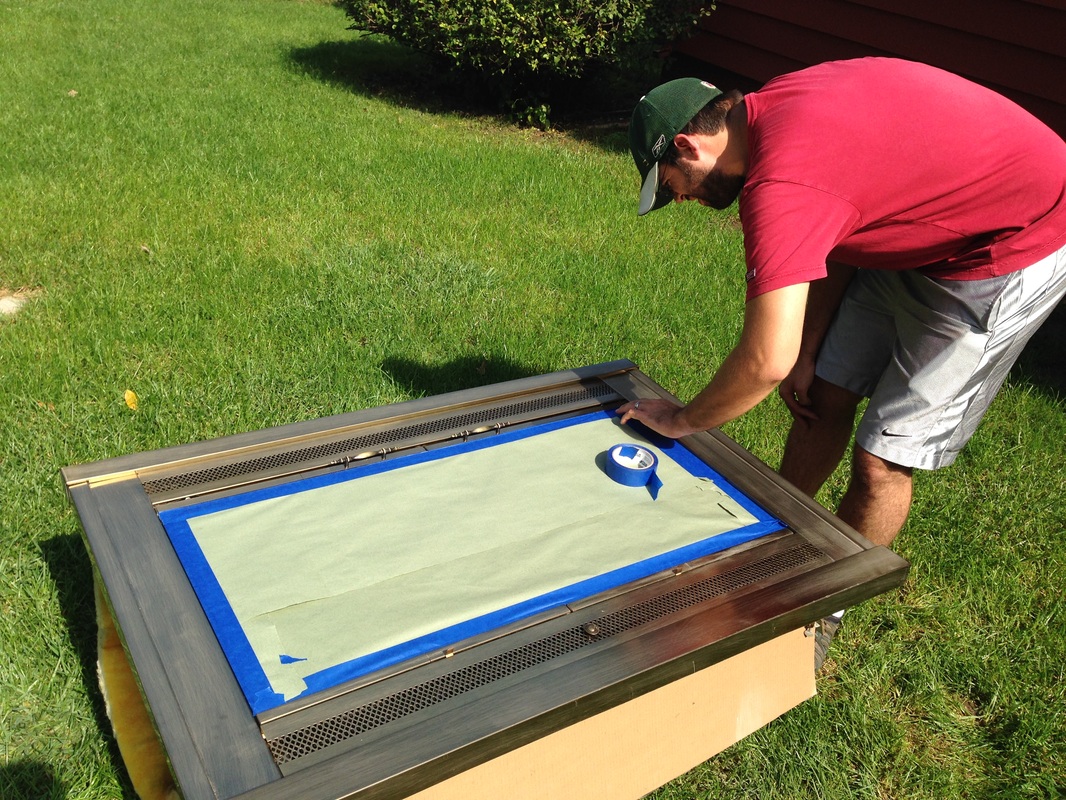
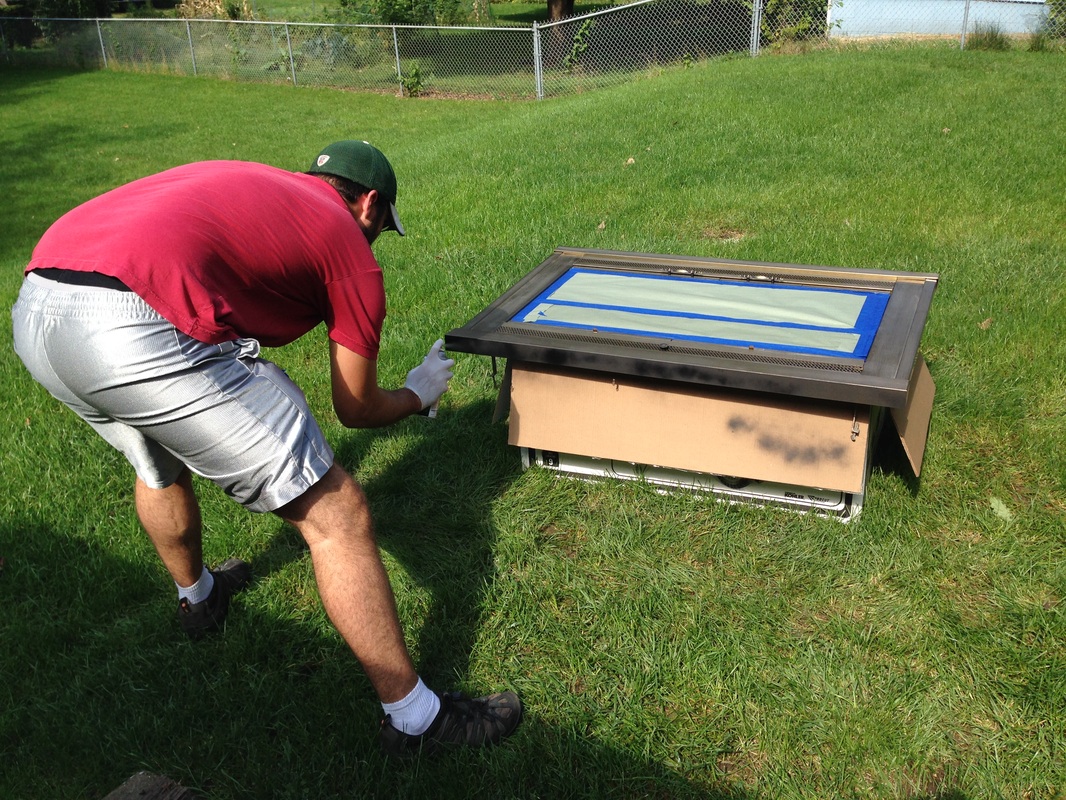
Meanwhile, Lucas was in charge of spray painting the fireplace cover. That brass just had to go. To remove the cover, we found four clamps holding it to the brick on the inside - one in each corner. A couple turns of the screwdriver and it popped right off. Lucas cleaned it off, gently rubbed it with a wire brush (to help the spray paint stick) and taped off the windows. We originally purchased only one can of Rustoleum high heat spray paint, but Lucas went back to get a second one. That's a lot of brass! Unfortunately, the high heat spray paint doesn't come in bronze/brown. So while I don't love the black, it's way better than the brass.
Meanwhile, Lucas was in charge of spray painting the fireplace cover. That brass just had to go. To remove the cover, we found four clamps holding it to the brick on the inside - one in each corner. A couple turns of the screwdriver and it popped right off. Lucas cleaned it off, gently rubbed it with a wire brush (to help the spray paint stick) and taped off the windows. We originally purchased only one can of Rustoleum high heat spray paint, but Lucas went back to get a second one. That's a lot of brass! Unfortunately, the high heat spray paint doesn't come in bronze/brown. So while I don't love the black, it's way better than the brass.
The Price
The project cost less than $15 for the two cans of spray paint and an 8-oz sample of Ultra White Valspar paint. It took about 4 hours, including two trips to the store, cleaning out the cobwebs inside the fireplace, painting, whitewashing and putting back together. I'd say that's worth it!
The project cost less than $15 for the two cans of spray paint and an 8-oz sample of Ultra White Valspar paint. It took about 4 hours, including two trips to the store, cleaning out the cobwebs inside the fireplace, painting, whitewashing and putting back together. I'd say that's worth it!

 RSS Feed